

Recently, Tencent DNSPod launched a new product - personalized DNS, which lets you customize blocklists to block ads and trackers. There were similar products in China before, like the “red fish” ones.
I had previously set up AdGuard Home on a Raspberry Pi to block ads and trackers at home. The advantage of doing this is that you only need to configure it on the gateway, without configuring each device at home individually. But the downside of using a Raspberry Pi is that it can’t be used when you’re away from home (obviously), and the resolution time is a bit longer (50-60ms, roughly double).
The newly launched DNSPod is currently in public beta and can be used for free without limits, which makes it perfect for testing the waters.
From DNSPod, enter public resolution, and after completing the setup, you’ll see the following interface.
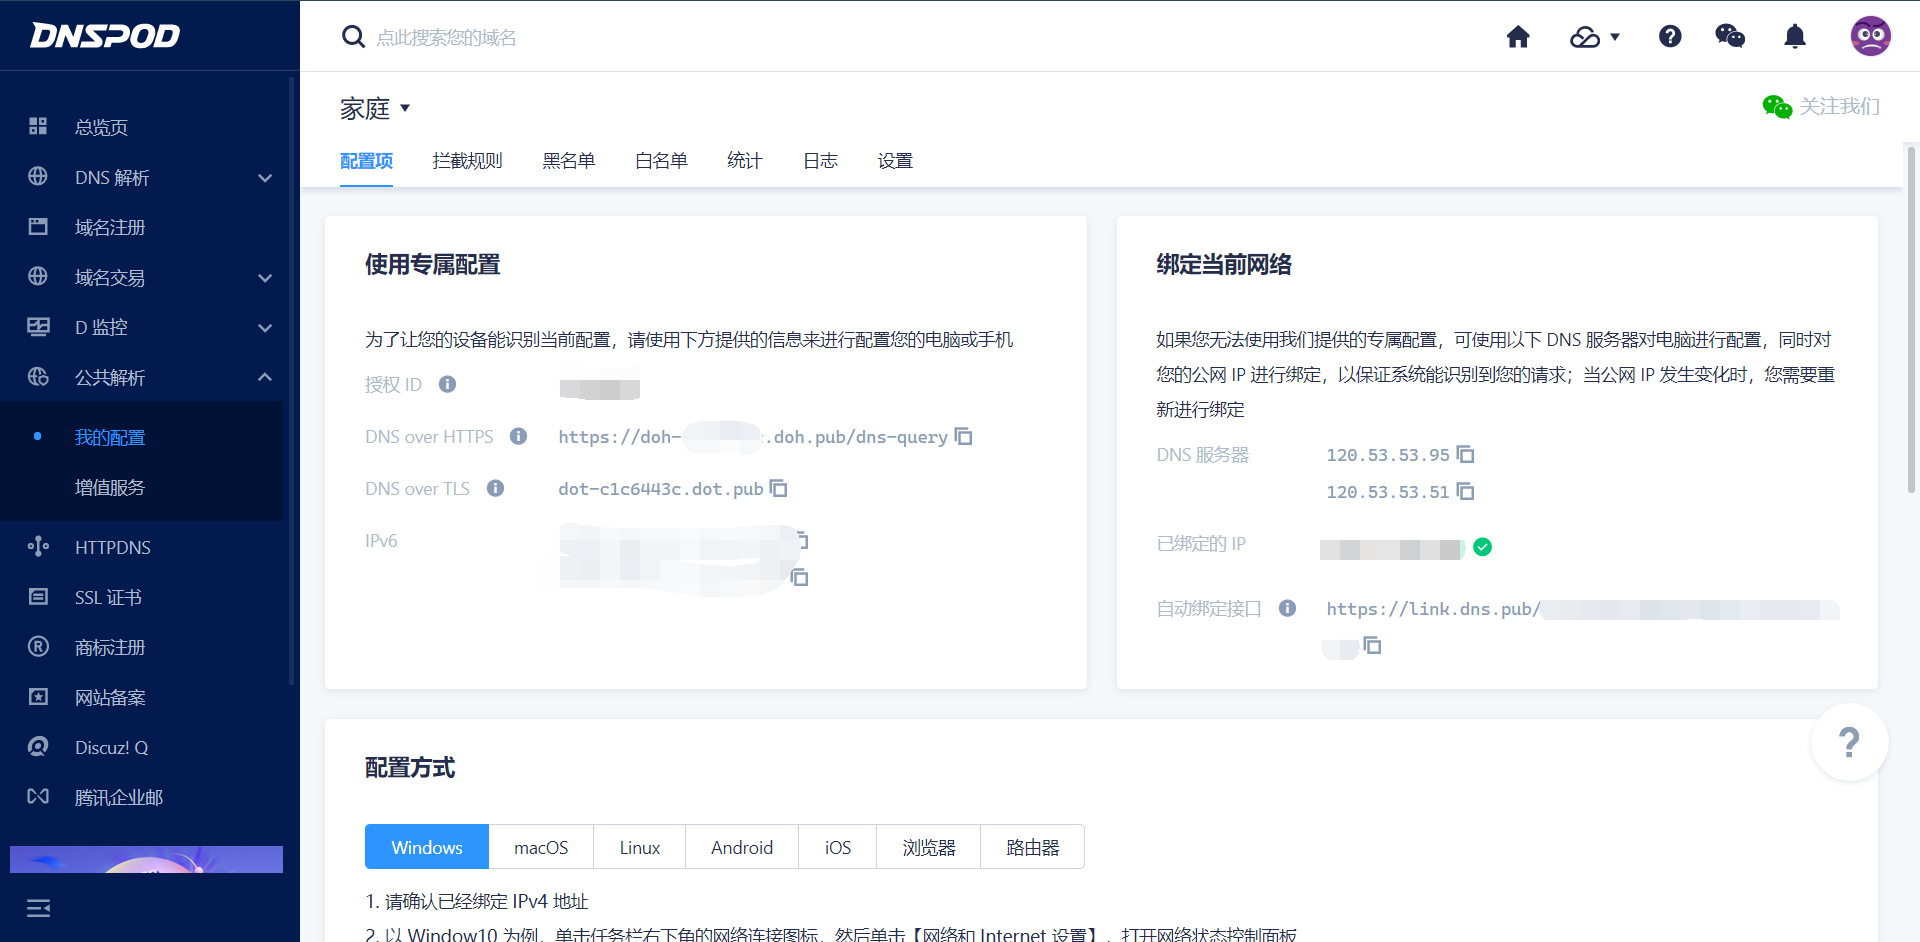
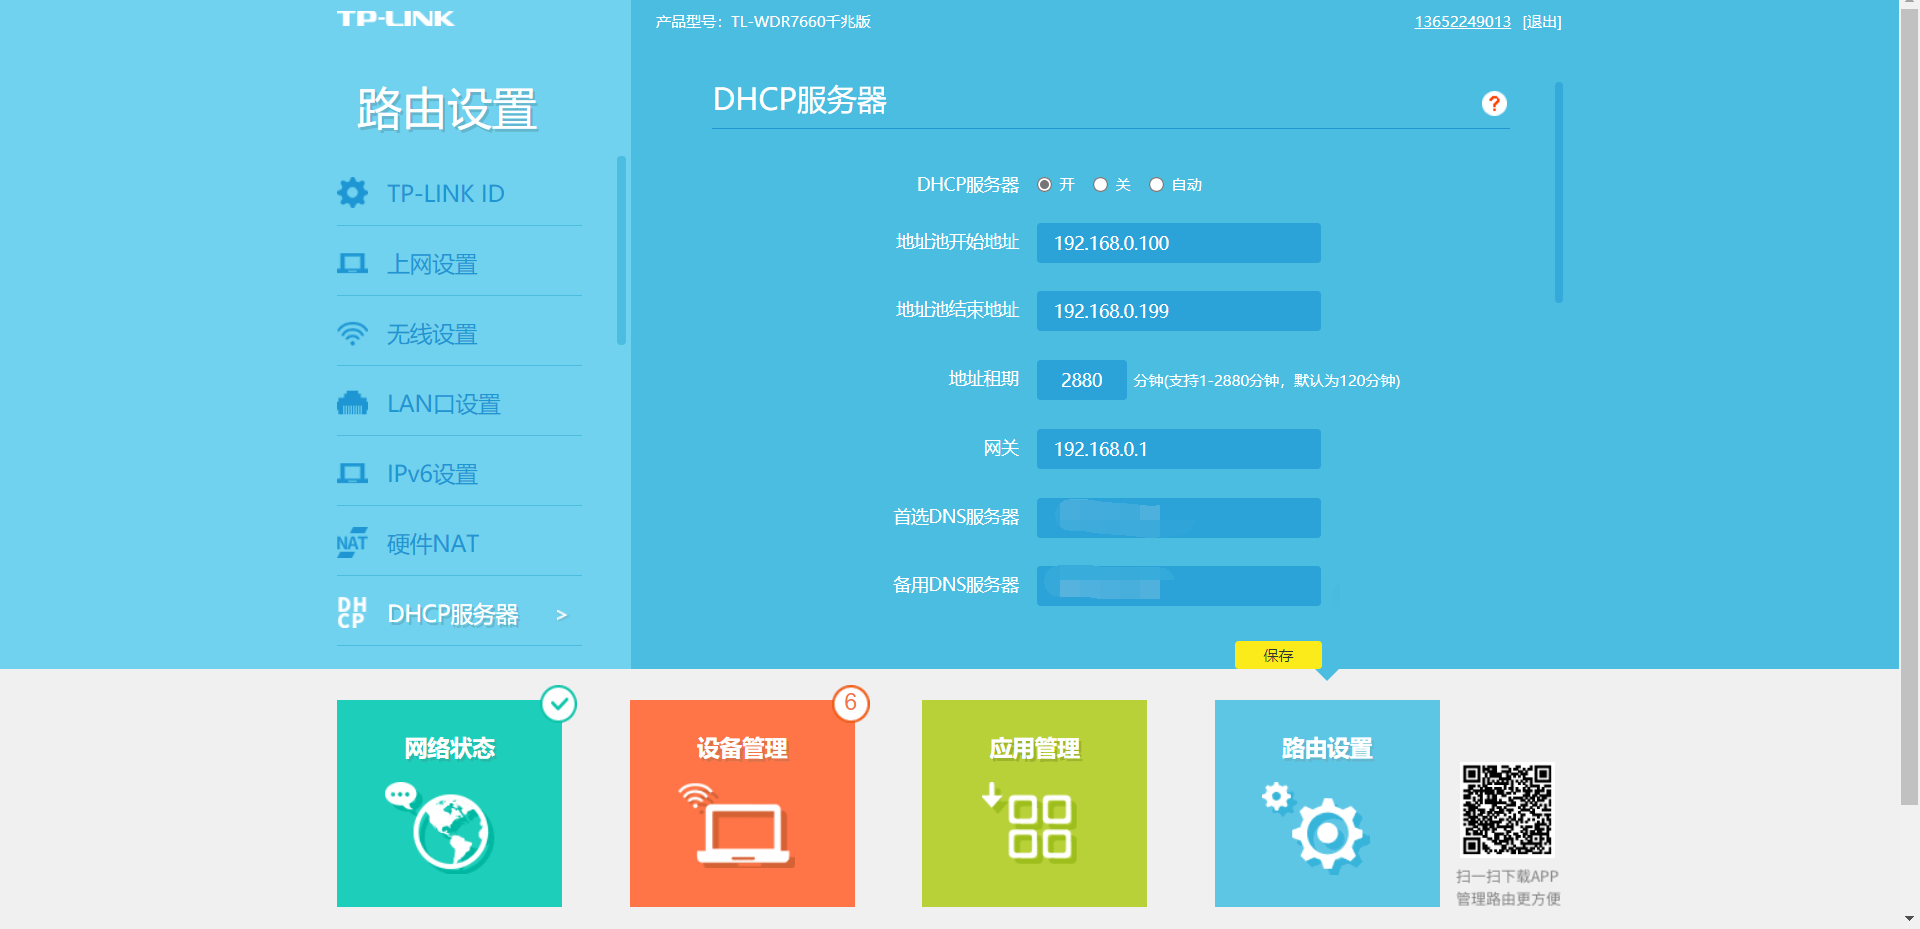
Then you just need to set the DNS server address in the router’s DHCP server settings.
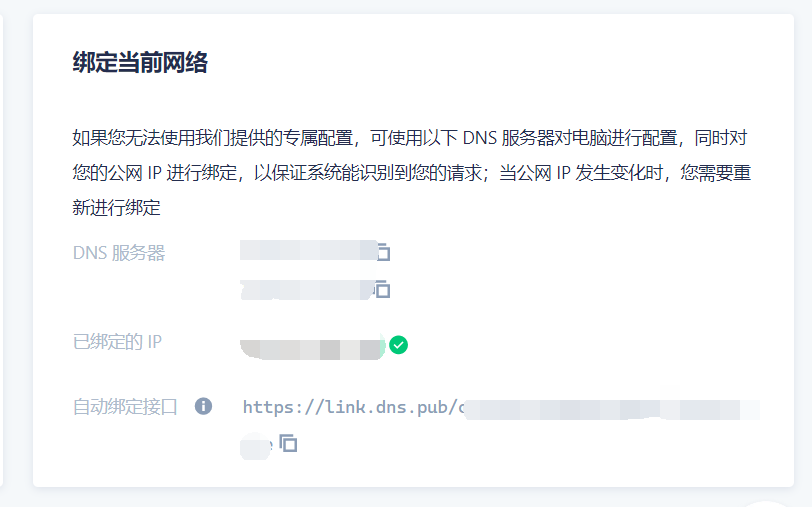
TP-LINK, pay up. Since DNSPod’s IPv4 addresses can’t be assigned 1-to-1 to every customer, you must bind your address to your account.
Home broadband typically uses a dynamic IP that changes every day, and we can’t log into DNSPod every day to bind manually. So they introduced a feature called the auto-bind API.
As long as the changed IP visits this API (via a GET request), it will be automatically bound. So we just need to set this address as our browser’s homepage.
(This really is the most reasonable solution)
The second method is to write a Python script that visits it, though you’d need to add it to startup or click it yourself every day.
import requestsrequests.get("xxxxxxxxxx") #this is your auto-bind API