

Part 1
Introduction to HEXO
Hexo is a fast, simple and powerful blog framework. Hexo uses Markdown (or other rendering engines) to parse your articles and, within seconds, generate static web pages with beautiful themes.
I used to use Jekyll, but unfortunately it supports fewer things and has slow generation speed, so I switched to HEXO.
1. Install HEXO
Everything is covered in the HEXO documentation.
2. Create a repository
If you are uploading the entire HEXO folder, you MUST set it to private!!
If you deploy using hexo deploy, then it’s up to you whether you set it private or not
Go to Github and create a new repository with any name. Remember to set it to private. This ensures only you and Vercel’s bot can see it.
As for why I upload the entire HEXO folder: it’s so you can continue writing your blog when you switch to another computer.
3. Initialize HEXO
hexo initLink with Github
cd hexoecho "# Blog" >> README.mdgit initgit add README.mdgit commit -m "first commit"git branch -M maingit remote add origin git@github.com:Tokisaki-Galaxy/blog.git #replace this path with your own repository addressgit push -u origin main3. Download a theme and set up submodule
Simply cloning the theme makes future updates very troublesome, so I use a submodule.
Recommended theme: hexo-theme-matery (of course you can use any other).
First fork it into your own repository on the web page, then run git submodule add https://github.com/blinkfox/hexo-theme-matery/ themes\hexo-theme-matery in the root directory to clone it as a submodule into the hexo-theme-matery folder under the themes directory.
Then try pushing with Github Desktop or git. If there are no problems, continue reading below.
Of course, some tutorials will tell you to set up deploy. Uploading the source directory and uploading the public directory produce identical results — the only difference is a slight variation in how it’s deployed on Vercel. But I prefer this method (after all, you can write blog posts directly on GitHub).
4. Local preview
Open any cmd or PowerShell, enter the folder from the previous step, type hexo s, then wait until you see Hexo is running at http://localhost:4000 and open this URL in your browser.
When you’re done, press Ctrl+C to close the local preview.
Oh right, the first time you run it, it will ask you to install dependencies — just follow the prompts.
5. Host with Vercel
Why use Vercel
-
Baidu indexing
-
Free
Vercel is the easiest way to deploy websites. Host your web projects with zero configuration, automatic SSL, and global CDN.
A similar product is netlify. It’s actually not bad either; the reason I don’t use it is that I can’t open its pages without a VPN.
Actually, I originally used Github Pages, but I didn’t like the domain (xxx.github.io), and it can’t be crawled by Baidu, so I eventually gave up on it.
Of course, you could also use Coding to split traffic for domestic (China) access, so Baidu can crawl your site, but that’s too much hassle.
And Coding’s service isn’t very stable. (Coding was updated in 2021; I haven’t tried it, so I can’t comment.)
Another option is gitee, which is quite good in every way, except that it doesn’t support custom domains.
1.Register on Vercel
2. Import
On the homepage click “Import Project”, then “Import Project From Git Repo”, and select GitHub. Authorize, then select the repository you created at the beginning to import.
Note: if you use my method of syncing the entire hexo folder to the cloud, you’ll see your project type is HEXO. If you used deploy, it will show as “other”.
Finally, you can visit a URL like xxxx.now.sh to access your blog (isn’t it much nicer than Github’s xxx.github.io?).
And if you sync the entire HEXO folder to github, you’ll find that
3. Get a domain
Some people might ask: isn’t the now.sh domain that Vercel provides good enough? Why bother with your own domain? Of course you can, it’s just that the access speed is painfully slow. With your own domain, you can use Cloudflare for acceleration!
You can get a domain from wherever you like — for example, buy a Tencent Cloud domain, where an xyz domain costs only 1 yuan for the first year, and it even comes with domain email support.
Of course, if you want to get one for free, register a free domain at freenom, then change the NS service provider to Cloudflare.
(However, freenom domains apparently can’t be used to register Tencent’s enterprise email)
4. Register on Cloudflare
As I said before, the access speed of now.sh in China is unbea(r)ra(b)ly(le) slow. Using Cloudflare can greatly improve access speed.
Register an account at cloudflare, then follow the step-by-step prompts to change the NS records (name server records) to the ones Cloudflare provides for you.
From then on, all DNS changes must be done on Cloudflare, otherwise they won’t take effect
5. Add a record pointing to Vercel
Go to Vercel, find “view domains” in the project, and enter the domain you want to use (i.e. the prefix + ”.” + the domain you obtained earlier).
Then follow the prompts to add a CNAME record on Cloudflare.
Actually, I originally wanted to set a CNAME record, but CNAME records always cause some weird problems, so I had to use an A record instead.

No matter what, please make sure the proxy status is yellow (proxied)
No matter what, please make sure the proxy status is yellow (proxied)
No matter what, please make sure the proxy status is yellow (proxied)
6. Add a 404 page
Create a now.json in the root directory with the following content:
{ "version": 2, "routes": [ { "handle": "filesystem" }, { "src": "/(.*)", "status": 404, "dest": "/404.html" } ]}Some pitfalls you may run into
1. Error 525 when visiting the blog, as shown below
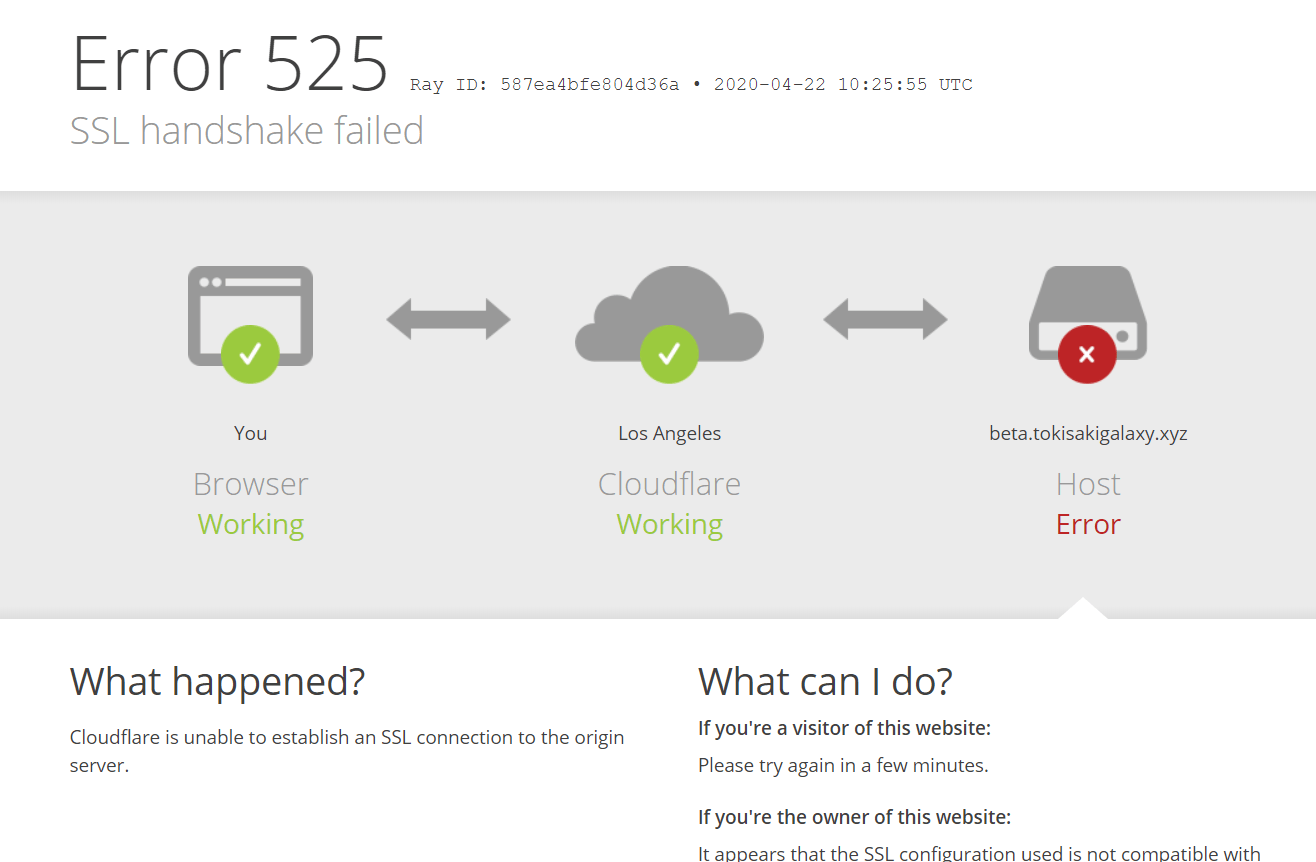
I’m not entirely sure what causes this problem, but it can be resolved by configuring the SSL/TLS rules in Cloudflare

As shown above, first set it to Off, then visit your blog until it loads normally, then set it to Full.
Part 2
This part is basically about custom blog configuration. I’m too lazy to write it.
Maybe I’ll write it later when I have time, or if someone actually reads this.
Integrating comments
Gitalk
Appendix
!update.bat
@echo offgit add -Agit commit -m "Updated: %date:~0,4%/%date:~5,2%/%date:~8,2% %time%"git push||git push||git push!preview.bat
hexo sPart 3
The built-in node is already good enough!!! You almost don’t need custom nodes anymore
Custom nodes may even slow things down!!!