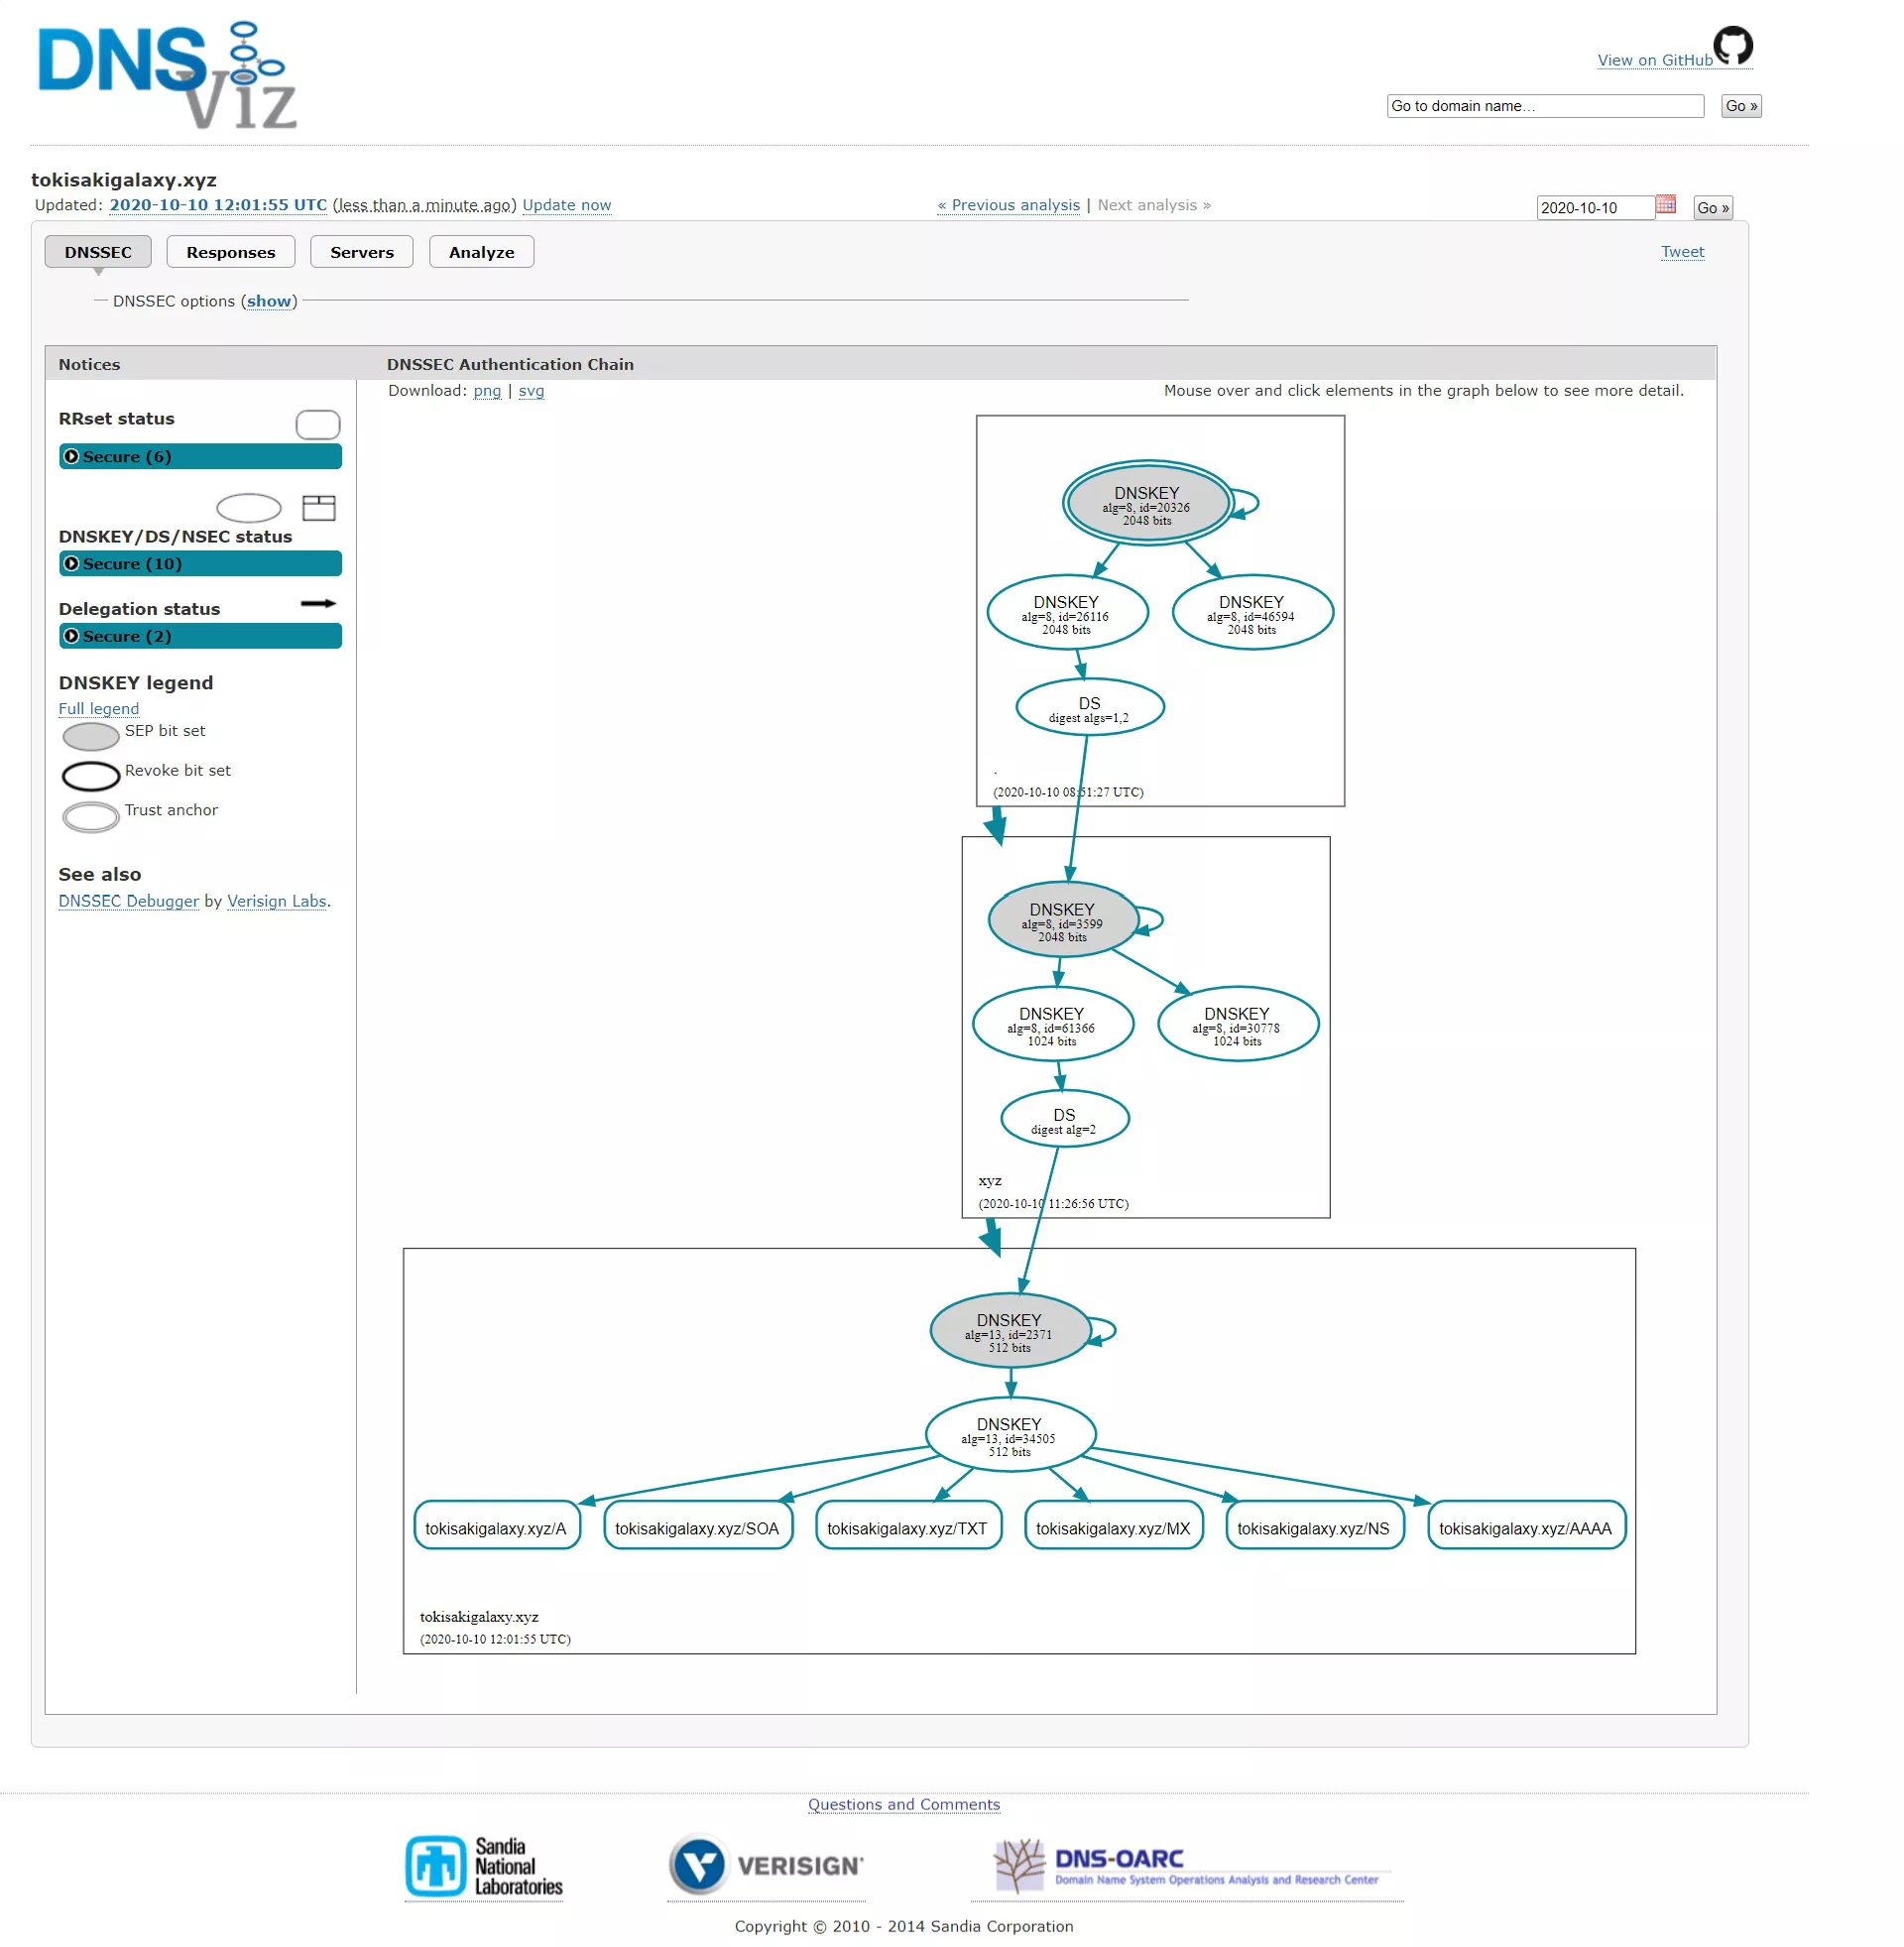
Introduction to DNSSEC
DNSSEC protects against forged DNS answers. DNSSEC-protected zones are cryptographically signed to ensure that the DNS records received are the same as the records published by the domain owner.
Enabling DNSSEC on Cloudflare
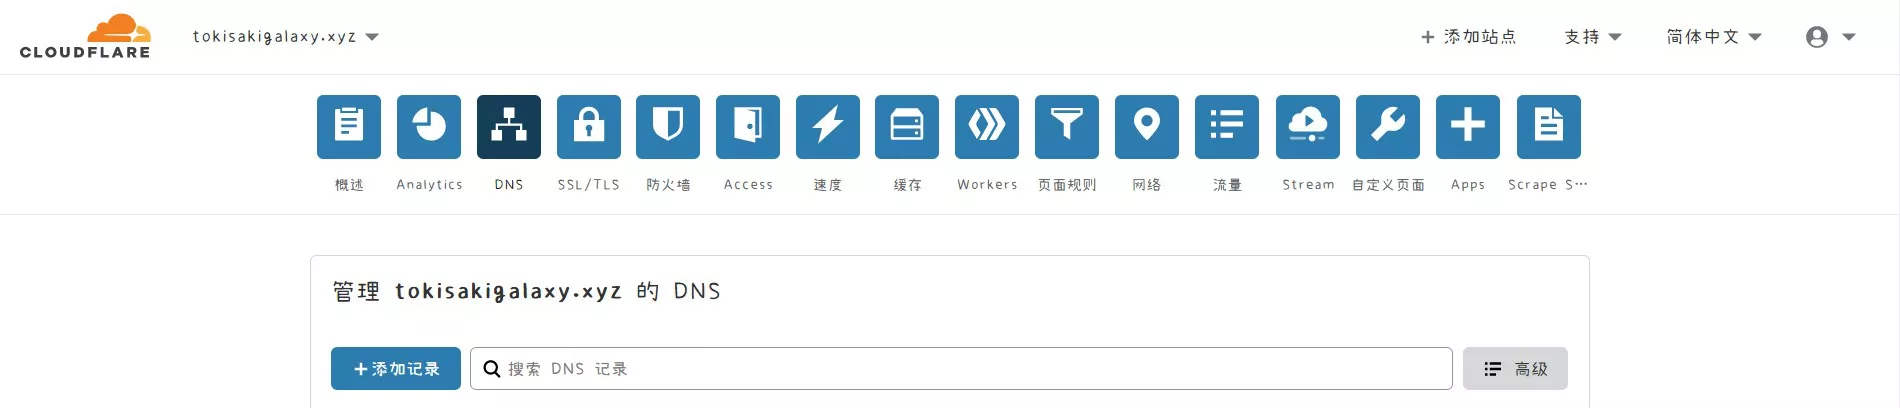
First, open the DNS page in Cloudflare.
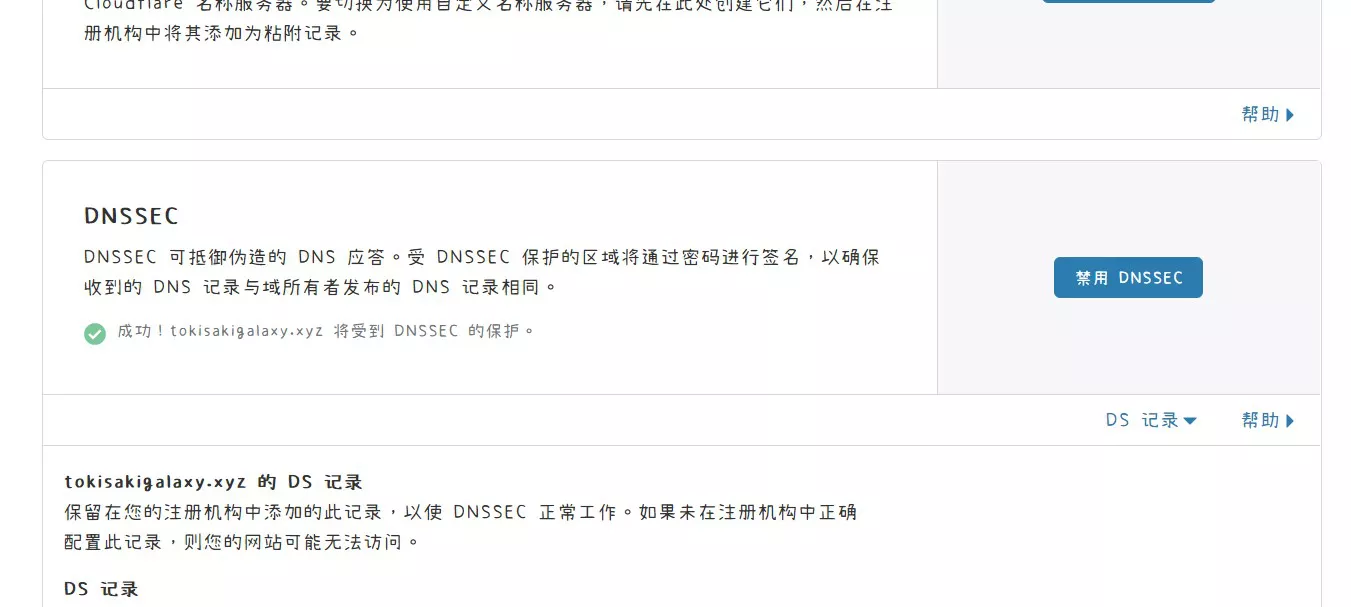
Scroll down to find DNSSEC, click Enable, and click the DS Record at the bottom right to expand it.
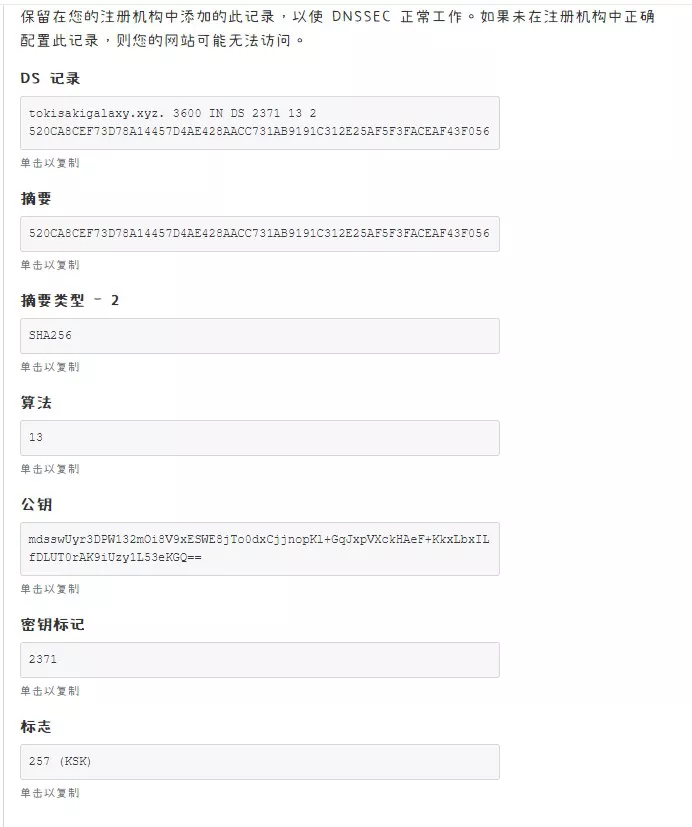
Enabling Tencent Cloud DNSSEC
https://console.cloud.tencent.com/domain, click Manage in the domain column -> Domain Security, then click the blue Settings button to the right of DNSSEC Settings below.
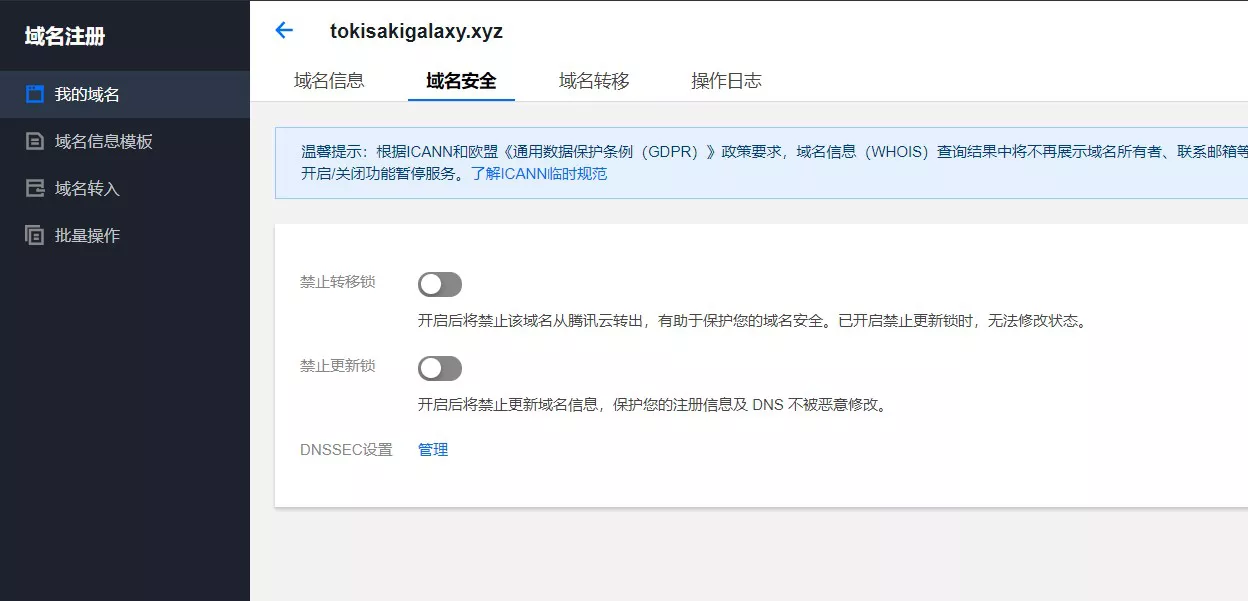
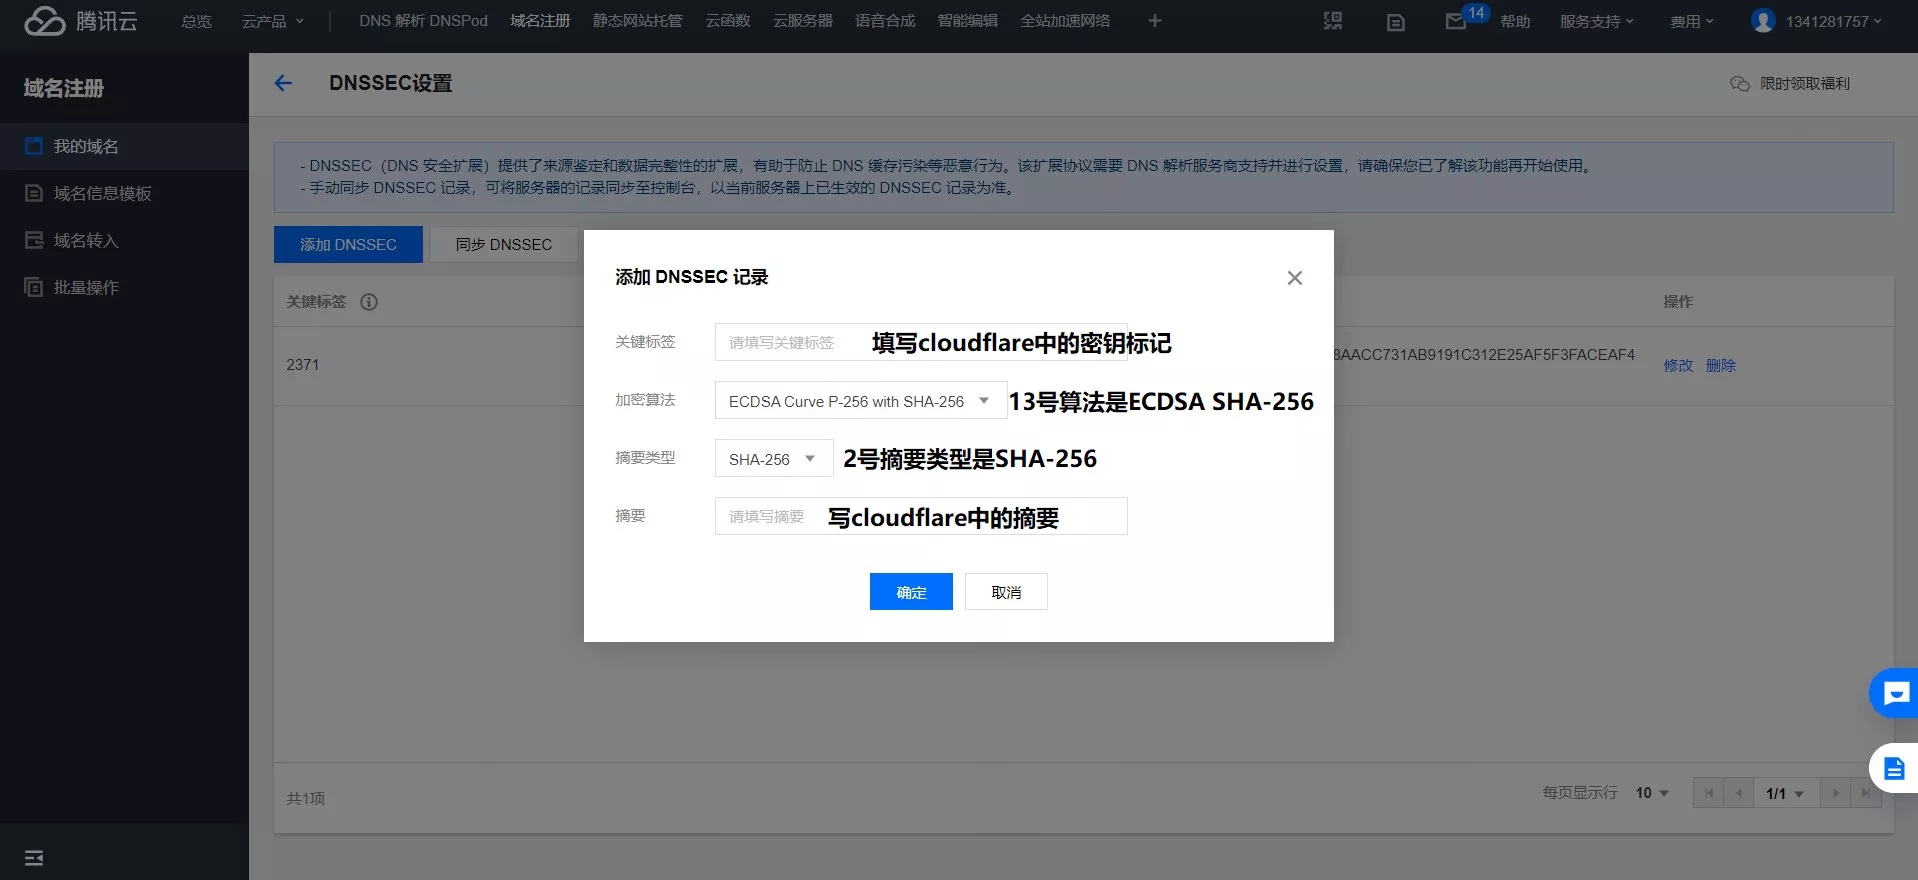
The first time you enter, there will be something to learn about. Just click Learn. Then fill in as shown below.
Verifying DNSSEC Status
Return to the Cloudflare DNS page; it should now look like this.
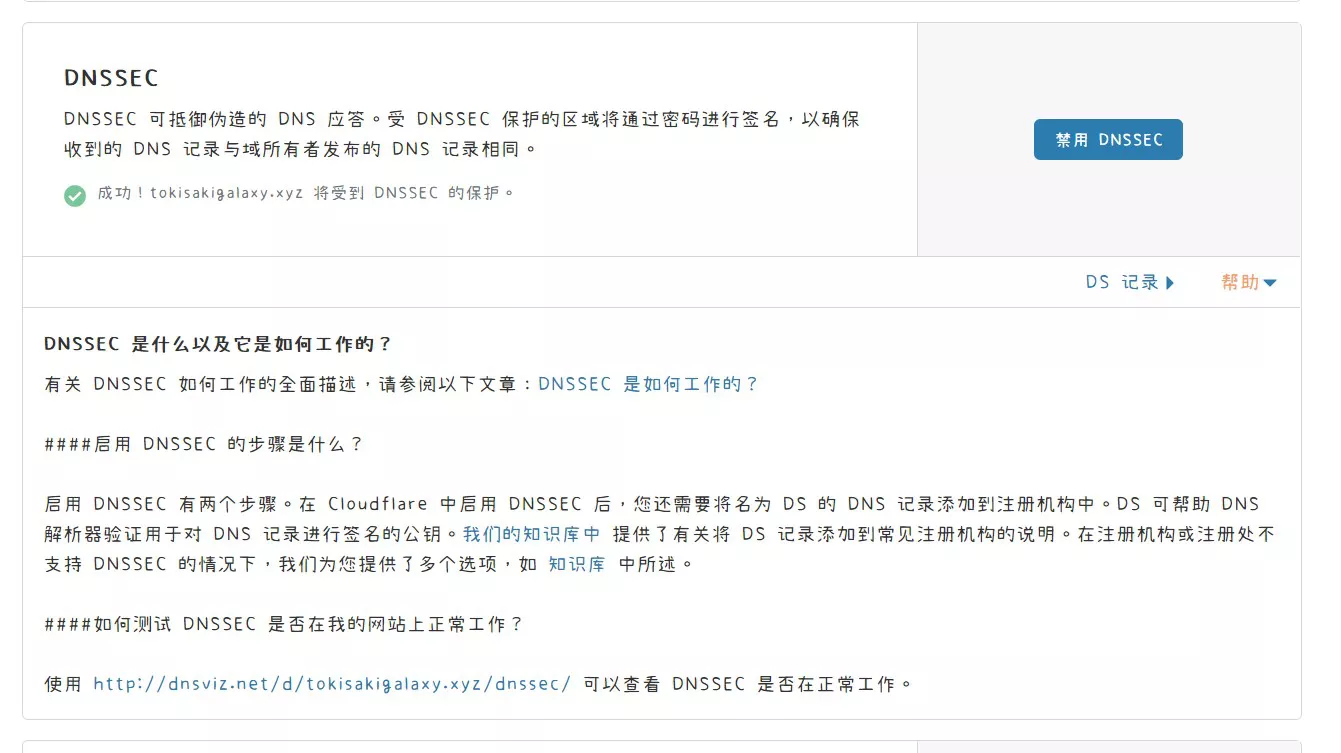
You can also use a third-party tool to check whether your website has successfully enabled DNSSEC. https://dnsviz.net/d/tokisakigalaxy.xyz/dnssec/